|
- Open a project
- Different working
modes
- Tree panel is
the list with all solutions, rough diamond model, polished diamonds, inclusions
and etc
- Description
of scene
- Movement panel
- Working with
photo
- 3D inclusions
- Flat / 3D inclusions
- Small spherical inclusions
- Sandwich
- New algorithm
for fast automatic creation of inclusion contour
- Creating virtual
"windows" on the model
- Allocate diamonds
- Default diamond
color panel
- Appraiser and
pricelist in allocation
- Diamond parameter
panel
- Description
of stereo mode
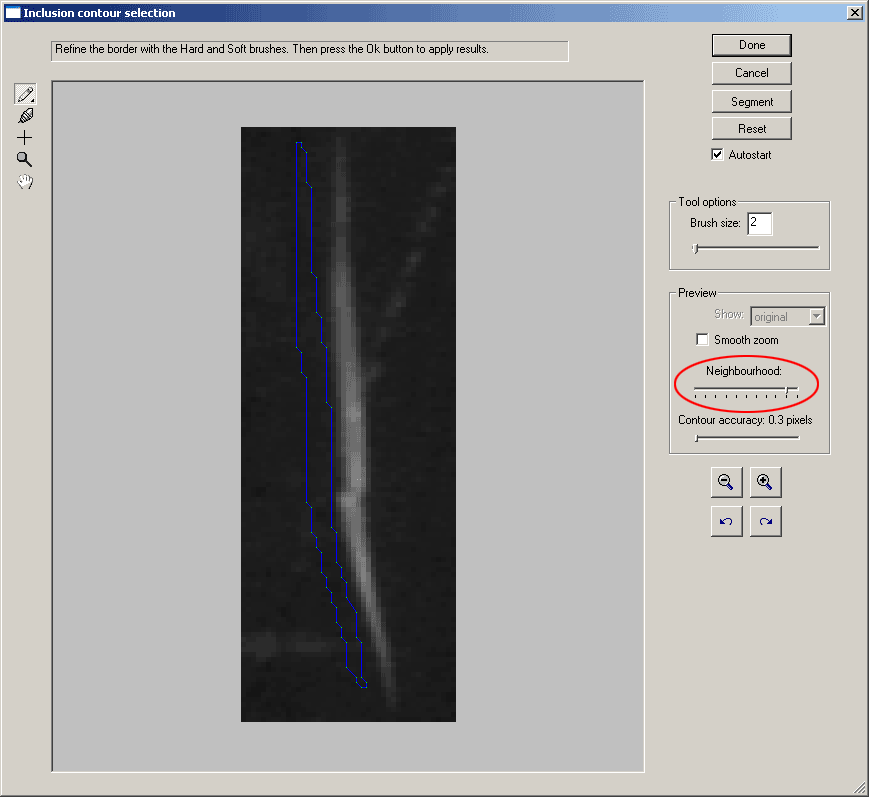
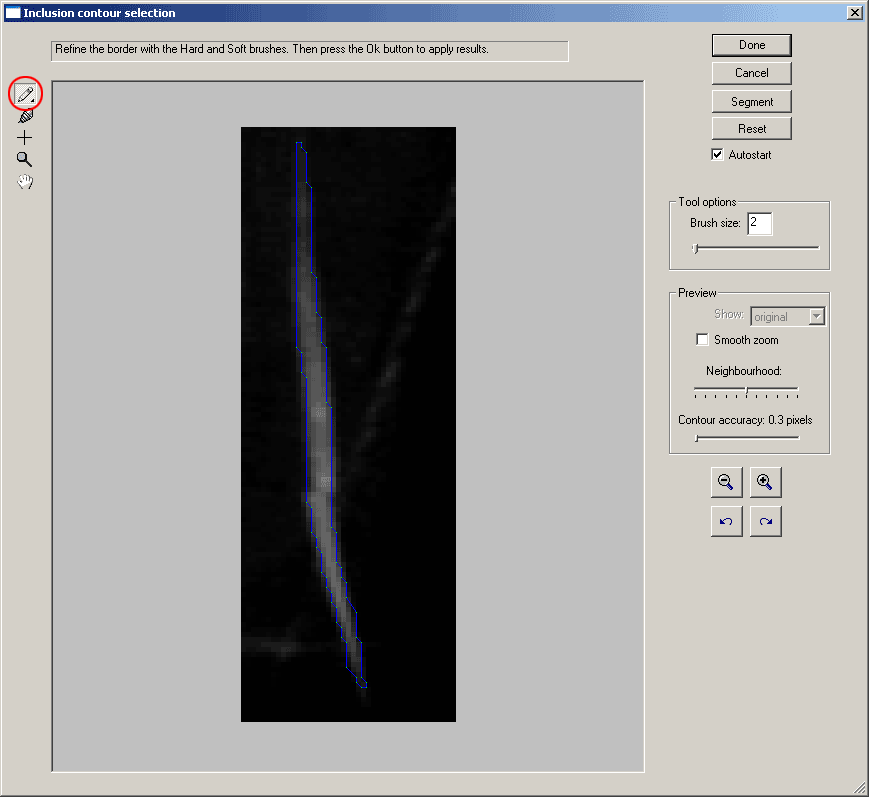
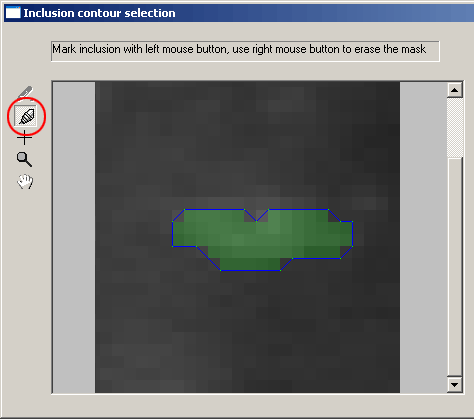
New algorithm for fast automatic creation of inclusion contour
This option is assigned to simplify a work with localization of inclusions. Plug-in for semi-automatic selection of contour allows to select contour of inclusion more quickly.
- Open mmd-project or oxg-file. Load set of photos.
- In the «Find inclusion» mode (choose in the toolbar) in the
panel «Inclusion locator» press on the button «Add new inclusion»
or select one of the existed inclusions.
- Choose the photo you want to use. To activate «Inclusion selection tool»
press
 button in the toolbar. button in the toolbar.
- Drag over the rectangle with inclusion image (click and move mouse over
the inclusion image holding the left button - the rectangle area will be indicated
while you drag the mouse).

Release the mouse button. The plug-in window will be launched (it contains
the image area you selected with mouse).
- Use "Hard Brush" and "Soft Brush" to create or edit
contour; left clicks to indicate the inclusion area and right clicks to indicate
the non-inclusion area when extra area is selected with program.
-
Use "draw" tool allows to create and edit small contours. "Draw" with left
mouse button, erase the selection with right mouse button. small contours
- Work with plug-in inclusion selection tool:
- If the displayed contour is good click Done to add this contour to inclusion
or press Cancel to reject.
- Use inclusion selection tool to create some other contours or edit an existing
contour.
- Tick on «Inclusions» checkbox in the «Photo collection»
panel and check accuracy of created inclusion.
Play demo 2.9 Mb (Windows Media Video) 
Download Windows Media Player 10 from microsoft page
|
|