- Open a project
- Different working
modes
- Tree panel is
the list with all solutions, rough diamond model, polished diamonds, inclusions
and etc
- Description
of scene
- Movement panel
- Working with
photo
- 3D inclusions
- Flat / 3D inclusions
- Small spherical inclusions
- Sandwich
- New algorithm
for fast automatic creation of inclusion contour
- Creating virtual
"windows" on the model
- Allocate diamonds
- Default diamond
color panel
- Appraiser and
pricelist in allocation
- Diamond parameter
panel
- Description
of stereo mode
Working with photo
The photos are controlled by the "Photo collection" panel.
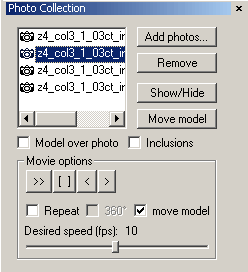
The following operations are available:
- Import photo
- Show/Hide photos in the active scene
- Show model and inclusion reflections over photo
- Movie options
- Move model
- Remove multiple photos
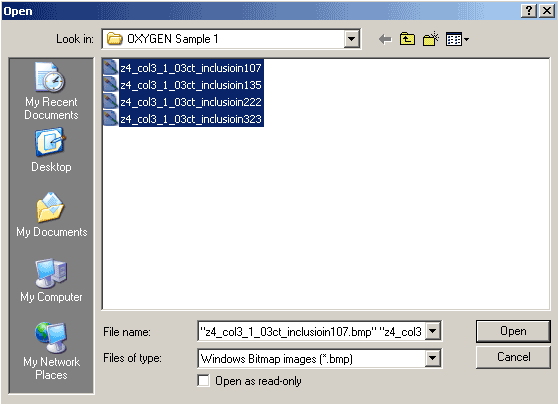
1. Import photo
To import photos click "Add photos…" button. Windows bitmap (.bmp) and JPEG (.jpg) files can be imported. Multiple files can be imported at one time including the entire 360 degrees of movie scan. Files are sorted according to the numbers.
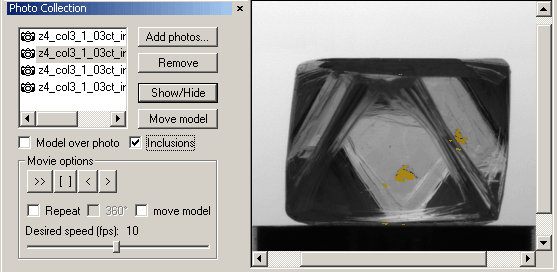
2. Show/Hide photos in the active scene
Activate the desired scene (click it) and then select the desired photo, for example "Photo 001". Click "Show/Hide" button. The selected photo will be displayed in the active scene. When the active scene displays the photo then clicking the "Show/Hide" button will clear the photograph from scene. Double clicking the photo in the list will immediately display it in the active scene.
3. Show model and inclusion reflections over photo
The photos coming from the Pacor system usually contain information about the diamond position in this photo. It allows you to use the photo for a number of tasks like inclusion finding and positioning. The "Show model" option allows the drawing of the diamond model over the photo. With this option you can check that the position information stored in the bmp file is accurate enough and corresponds to the current rough model. The "Show inclusion" option places the inclusions over the photo.
4. Movie options
Movie options allow the photos to be displayed as a movie; usually as a rotating rough diamond.
To «rotate» photo of rough by mouse press and hold the left mouse button over the photo and move mouse («drag») to the left or right.
You can use «play», «pause», «step forward», «step backward» options in the Movie options panel. Set the «repeat mode» for continuous playing and also set the desired speed.
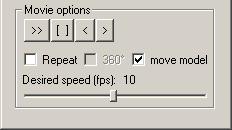
The descriptions of «move model» option see in the next section.
5. Move model
Select any Scene without photo. The button «Move model» turn the camera looking at the diamond the same direction you see the photo.
Select the Scene with photo. For instance the left top Scene. The button «Move model» turn the right Scene camera and get scale of the model is the same as photo.

The checkbox «move model» allows rotate the photo of the diamond and the model together while playing movie.
6. Remove multiple photos
You may select the group of photos in the "Photo Collection" panel using [Shift] key and remove all of them with "Remove" button.
|


